
Understanding OBD Scanners and Their Role in Car Troubleshooting
What is an OBD2 Scanner and How Does It Work?
An OBD2 Scanner, or On-Board Diagnostics scanner, is a vital tool for monitoring vehicle performance and identifying issues through standardized systems embedded in vehicles. These devices connect to a vehicle’s ECU (Engine Control Unit) and retrieve diagnostic trouble codes (DTCs), which offer insights into potential malfunctioning components. The benefit of using an OBD2 scanner extends beyond mere diagnostics—it significantly reduces repair times and costs by accurately identifying the root cause of issues. This efficiency supports proactive car maintenance, ultimately leading to fewer breakdowns and enhanced vehicle lifespan.
Key Components: OBD Cable, Wiring Harness, and Diagnostic Ports
OBD cables are critical components for connecting the scanner to a vehicle's diagnostic system, facilitating data transmission between devices. Different types of OBD cables fulfill specific connections, underscoring their role in reliable data transfer. Equally important is the wiring harness, which directly affects the scanner's efficiency by ensuring a stable connection, thus enhancing the functionality of the scanning process. Identifying the OBD2 port location is essential for effective use, as ports are commonly situated under the dashboard or near the steering column in various vehicle models, offering easy access for diagnostics.
OBD1 vs. OBD2: Compatibility and Evolution
OBD1 technologies marked the early years of on-board diagnostics, with limitations mainly due to their manufacturer-specific standards. This lack of uniformity led to the development of OBD2, which offers standardized protocols across various car models. Compatibility issues can arise for older vehicles that may not support OBD2 technology, essential to consider when upgrading diagnostic tools. The evolution from OBD1 to OBD2 brought significant improvements, such as expanded data sets and enhanced diagnostic capabilities, ensuring more precise and comprehensive troubleshooting for modern vehicles.
Preparing to Use Your OBD Scanner Effectively
Locating the OBD2 Port in Your Vehicle
Finding the OBD2 port in your vehicle is the first step to effectively using your diagnostic tool. Typically, these ports are located under the dashboard, near the driver's seat. However, the exact location can vary depending on the vehicle model and manufacturer. Some automakers place the port on the passenger side or around the center console. It is advisable to consult your vehicle's manual for precise location details. By knowing where to find the port, car troubleshooting becomes more straightforward, allowing you to connect the OBD scanner and retrieve vital diagnostic information.
Checking Automotive Wiring Harness Connections
Ensuring secure connections in your automotive wiring harness is essential for accurate OBD scanning. A reliable connection is critical to prevent data loss or misinterpretation during diagnostics. Inspect the wiring harness for any signs of wear, damage, or corrosion, which can affect the connection's integrity. It's recommended to use a multimeter to verify the continuity in the wiring harness, as faulty connections can hinder effective car troubleshooting. By regularly checking these connections, you maintain the scanner's accuracy and ensure ongoing vehicle maintenance.
Ensuring Proper Power Supply and Grounding
A proper power supply and grounding are crucial for the functionality of your OBD scanner. Before using the scanner, check the vehicle's battery voltage to ensure it provides adequate power. A poor ground connection can lead to errors in communication between the scanner and the vehicle's ECU. As part of routine car maintenance, regularly inspect the power supply systems to prevent such issues. By taking these preventive measures, you enhance the reliability of your diagnostic efforts and ensure seamless vehicle maintenance.
Step-by-Step Guide to Troubleshooting with an OBD2 Scanner
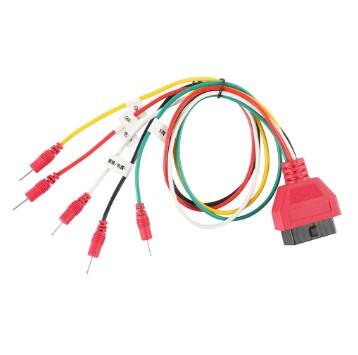
Connecting the Scanner: OBD2 Y-Cable and Port Setup
To troubleshoot effectively with an OBD2 scanner, starting with a reliable connection is paramount. Begin by ensuring your vehicle's ignition is off before connecting the OBD2 Y-cable to the OBDII port, typically located under the dashboard. The Y-cable aids in observing multiple data streams simultaneously, enhancing your troubleshooting efficiency. During setup, common mistakes include failing to secure the connection correctly or attempting the setup with a faulty cable—errors to avoid for optimal scanner functionality. Precision in these initial steps sets the foundation for accurate diagnostics.
Reading and Documenting Diagnostic Trouble Codes (DTCs)
Accessing and documenting Diagnostic Trouble Codes (DTCs) is crucial for effective troubleshooting. Start by powering on the vehicle without starting the engine; this activates the electrical system for scanner use. Navigate the scanner interface to retrieve DTCs, which provide detailed insights into vehicle issues. Documentation is not just recommended but necessary, as it helps track recurring problems and supports future diagnostics. For instance, a common code like P0171 indicates a lean fuel mixture, offering direction for resolving issues within the fuel system. Understanding these codes can significantly streamline maintenance efforts.
Using Live Data Streams for Real-Time Analysis
Live data streams play a vital role in real-time vehicle diagnostics. These streams provide continuous data on crucial parameters such as engine RPM, coolant temperature, and vehicle speed, aiding in the identification of immediate issues. Analyzing this data allows for adjustments to your troubleshooting techniques based on real-time findings. For effective use, focus on interpreting anomalies or fluctuations in these parameters, as they can indicate problems even before a trouble code is triggered. This proactive approach ensures timely corrective measures, enhancing vehicle performance and reliability. Use live data to refine diagnostics and improve vehicle issue resolution.
Common OBD Scanner Connection Issues and Fixes
Resolving ‘No Communication’ Errors with Cable Harness Checks
Identifying 'No Communication' errors during an OBD2 scan can be frustrating. These errors typically appear when the scanner fails to communicate with the vehicle’s onboard systems. Recognizing these issues involves checking for error messages on the scanner display, such as "No Link" or "Unable to Communicate." To troubleshoot, first inspect the OBD2 cable harness for any visible damage or breaks. Ensure that the connectors are firmly attached to both the scanner and the OBD2 port on the car. Common setup errors include loose connections or dirt obstructing the connectors. To fix these, securely reconnect all cables, clean the connectors if needed, and ensure the car’s ignition system is set to the "ON" position without starting the engine. Regular maintenance of the cable harness can prevent these issues, ensuring a reliable scanning process.
Addressing Low Voltage or Power Supply Problems
Low voltage or power supply problems are common issues affecting an OBD2 scanner's performance. Typical symptoms include the scanner not turning on or intermittent power failure. These are signs of insufficient voltage from the vehicle's battery. Start by testing the power output from the vehicle's OBD2 port using a multimeter to confirm it meets the required voltage levels. If voltage is inadequate, consider solutions like replacing the car battery or checking for power supply interruptions caused by corroded connections or blown fuses. Additionally, inspecting the alternator's performance can prevent voltage drops. Reliable power ensures that diagnostics are both accurate and uninterrupted, benefiting the troubleshooting process.
Fixing Protocol Mismatches (ALDL, MOBD, MUTT)
Protocol mismatches occur when the scanner is configured for a protocol that does not align with the vehicle’s communication protocol. Different cars use various On-Board Diagnostics protocols, such as ALDL, MOBD, and MUTT, which can affect the scanner's ability to connect. Identifying protocol mismatches involves checking the vehicle’s specifications to determine the supported OBD protocol. The solution is to adjust the scanner settings to match the protocol of the vehicle. Most scanners allow users to select the appropriate protocol manually via their settings menu. To resolve mismatches, ensure the scanner is configured correctly before starting a diagnostic session. Understanding and applying the correct protocol is crucial for accurate and effective vehicle diagnostics.
Interpreting OBD2 Codes and Taking Action
Decoding P0xxx and Manufacturer-Specific Codes
Understanding P0xxx codes is crucial for diagnosing issues in modern vehicles, as these codes represent generic error messages recognized universally across different car models. P0xxx codes are standardized, meaning they have the same meaning regardless of the vehicle, and they correspond to various system errors like engine, transmission, or emission control problems. However, when it comes to manufacturer-specific codes, the situation becomes more complex. These codes deviate from the standardized ones and are unique to specific vehicle manufacturers. For example, while a P0301 might universally indicate a cylinder misfire, a manufacturer-specific code could provide deeper insights specific to that brand's technology. To navigate these codes effectively, utilizing online databases and resources can be invaluable. Websites and software provide detailed explanations, helping car owners and technicians interpret these error codes and identify the necessary steps for resolution.
Prioritizing Repairs Based on Severity Levels
Assessing the severity of vehicle issues is essential for effective repair prioritization. Different error codes can signal varying degrees of urgency, ranging from mild inconveniences to critical threats that require immediate attention. For instance, a P0456 code indicating a small emission leak might be less urgent than a P0700 code pointing to a transmission problem. Prioritizing repairs based on urgency ensures that severe issues are addressed first, reducing the risk of further vehicle damage. Experienced mechanics often emphasize the need for a strategic approach to repairs, suggesting that immediate attention to critical problems can prevent them from escalating into bigger, costlier faults. Expert recommendations often stress dealing with issues like brake malfunctions or severe engine problems first, while issues related to non-essential systems can wait for scheduled maintenance.
When to Clear Codes vs. Seeking Professional Help
Determining when to clear OBD2 codes or seek professional help is a significant aspect of vehicle maintenance. Clearing codes can be useful when a minor issue is resolved, and you want to verify whether the problem recurs. However, it's essential to recognize when a deeper, professional diagnostic is necessary. Signs indicating the need for expert help include persistent warning lights after code clearing, unusual noises, performance issues, or multiple codes that may suggest complex problems. Ignoring unresolved codes or frequently clearing them without addressing the underlying issues can lead to prolonged damage and costly repairs. Long-term consequences include worsening vehicle performance, increased fuel consumption, and eventual system failures, making early professional intervention vital to maintaining vehicle health and efficiency.
Advanced Tips for Maintaining Your OBD Scanner and Vehicle
Updating Scanner Software for New Vehicle Models
Keeping your scanner software updated is crucial for ensuring optimal performance and compatibility with modern vehicles. Regular updates incorporate the latest protocols and definitions, enabling your OBD scanner to accurately interpret the diagnostics of newer car models. To update, follow a simple process: check for updates through the scanner’s app or website, download the necessary files, and install them onto your device. Updated software can significantly improve diagnostic capabilities, allowing the scanner to work seamlessly with the latest vehicle electronics, thus maximizing its utility.
Preventing Future Issues with Regular System Scans
Regular system scans are vital for proactive automotive maintenance, helping identify potential issues before they become costly problems. Conducting a scan every three months is generally recommended for most vehicles, but more frequent checks may be necessary for older models with higher mileage. To keep on top of these scans, consider using maintenance apps or tools that send reminders, ensuring you never miss a scheduled check. By maintaining a consistent scanning routine, you ensure your vehicle's longevity and reliability, catching problems early and addressing them promptly.
Integrating OBD Data with Preventative Maintenance Schedules
Integrating OBD2 data into your vehicle’s maintenance schedule can enhance maintenance accuracy and efficiency. The real-time insights offered by OBD data help tailor maintenance intervals based on actual vehicle usage rather than manufacturer estimates. Start by using OBD reports to identify common issues or patterns, incorporating them into a preventative maintenance schedule that includes checks, fluid changes, and part replacements. This personalized approach is exemplified by vehicle owners who have successfully used OBD data to prevent breakdowns and streamline their maintenance practices, ensuring their vehicles remain in peak condition.
Frequently Asked Questions
What is the purpose of an OBD2 scanner?
An OBD2 scanner is used to monitor vehicle performance and diagnose issues by accessing diagnostic trouble codes from the vehicle’s ECU. It helps in identifying malfunctioning components, reducing repair times and costs, and enhancing vehicle lifespan through proactive maintenance.
How do I find the OBD2 port in my car?
The OBD2 port is typically located under the dashboard near the driver's seat, but locations can vary depending on the vehicle model and manufacturer. Some automakers place it on the passenger side or near the center console.
What should I do if my OBD2 scanner shows a ‘No Communication’ error?
'No Communication' errors can often be resolved by checking the OBD2 cable harness for damage, ensuring connectors are securely attached, and making sure the vehicle's ignition is on without starting the engine. Regular maintenance of the cable harness is also recommended.
When should I update my OBD scanner software?
Regular software updates are important for ensuring compatibility with new vehicle models and improving diagnostic accuracy. Check for updates through your scanner's app or website and follow the instructions to download and install them.
Table of Contents
- Understanding OBD Scanners and Their Role in Car Troubleshooting
- Preparing to Use Your OBD Scanner Effectively
- Step-by-Step Guide to Troubleshooting with an OBD2 Scanner
- Common OBD Scanner Connection Issues and Fixes
- Interpreting OBD2 Codes and Taking Action
- Advanced Tips for Maintaining Your OBD Scanner and Vehicle
- Frequently Asked Questions